 Save to Pinterest
 The first time I tried making pavlova, the sound of egg whites whirling in the mixer was almost hypnotic—a light hum under the anticipation in my kitchen. I was drawn in by the promise of a dessert both crisp and cloud-like, and making it felt like conjuring something magical out of simple ingredients. That day, the scent of vanilla drifted in the air, blending with hints of sugar as the oven warmed. I'll admit, I hovered near the oven door more than I'd care to admit, anxious to see if my meringue would set. Watching the snowy shell crackle gently after cooling felt like discovering a hidden treasure.
One spring, I made pavlova for friends coming over after a hike—muddy shoes left by the door, laughter echoing, and everyone hungry for something sweet and fresh. There was a real sense of celebration as I piled berries onto the whipped cream, and even the quietest among us seemed to light up at that first bite. That afternoon, even the dog hovered underfoot, hoping for a touch of whipped cream (no luck). Somehow, sharing pavlova made the day feel more memorable than any dessert alone could.
Ingredients
- Egg Whites: Room temperature whites whip higher and steadier—a trick I learned after a few collapsed meringues.
- Superfine Sugar: Dissolves quickly for that smooth, glossy finish (try pulsing regular sugar in a blender if you’re in a pinch).
- Cornstarch: Helps the interior stay soft and marshmallowy, not just crisp.
- White Vinegar: Balances the sweetness and gives the meringue structure—a little goes a long way.
- Vanilla Extract: Adds warmth and depth you notice in the aroma more than the taste.
- Heavy Whipping Cream: Make sure it’s cold before whipping for the best texture.
- Powdered Sugar: Sweetens the cream delicately, and blends in smoothly without graininess.
- Fresh Berries: Choose the ripest you can find, and mix varieties for color and flavor.
- Fresh Mint Leaves: Optional, but they brighten the look and lend a cool fragrance on the plate.
Tired of Takeout? 🥡
Get 10 meals you can make faster than delivery arrives. Seriously.
One email. No spam. Unsubscribe anytime.
Instructions
- Prep Your Oven Space:
- Line your baking sheet with parchment and draw an 8-inch circle—trace it lightly so you can still see the outline. Flip the paper so the pencil doesn't touch your pavlova.
- Whip Egg Whites:
- Start beating them on medium speed, listening for the shift from foamy to thick, then wait for soft peaks to form before moving on.
- Add Sugar Gradually:
- Sprinkle in the sugar spoon by spoon; patience here gives you a glossy, stiff meringue that holds its shape.
- Fold Extras In:
- Using a spatula, gently fold in the cornstarch, vinegar, and vanilla—slow movements stop the air from escaping.
- Shape the Meringue:
- Spoon the mixture onto your circle, sculpting raised edges with the back of your spoon so it can cradle cream and fruit later.
- Bake and Cool:
- Let it bake until snowy and crisp, then turn off the oven and leave the door slightly open for a slow, gentle cooling that avoids cracks.
- Whip the Cream:
- Beat cream, powdered sugar, and vanilla until soft peaks—watch for thick, pillowy swirls rather than runny trails.
- Assemble:
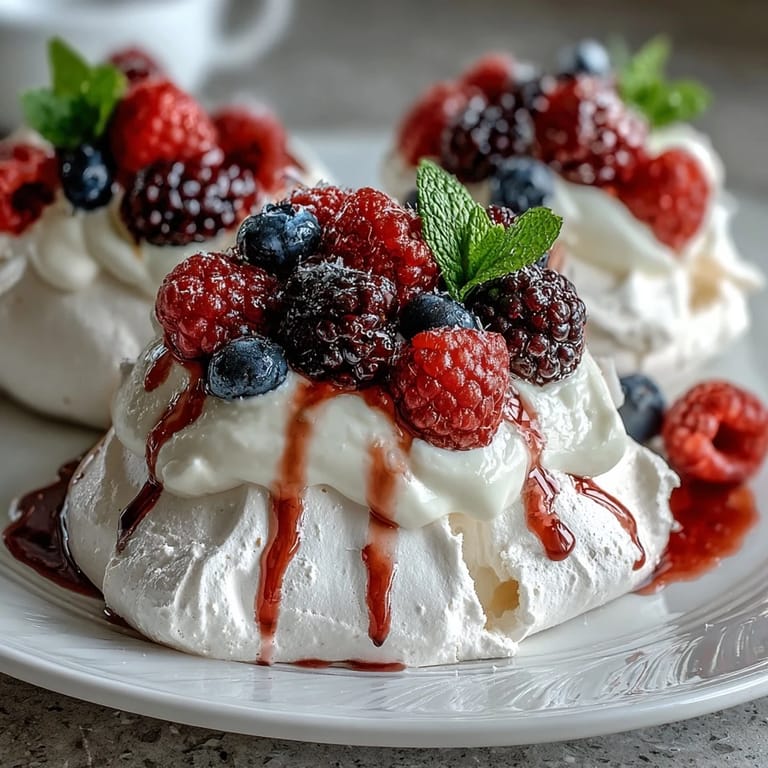
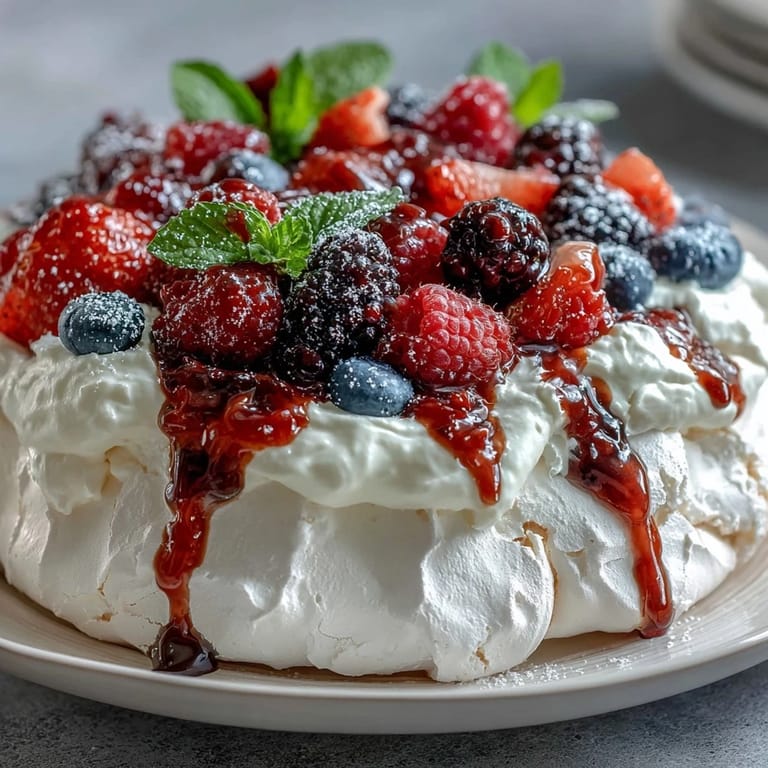
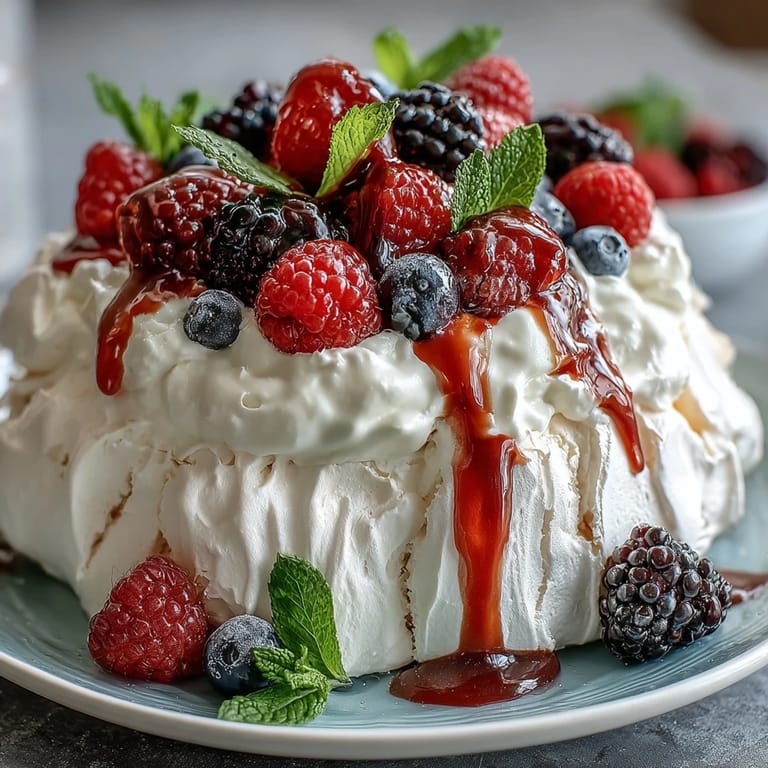
- Carefully transfer the cooled meringue to a platter, spread with whipped cream, and shower with berries.
- Final Flourish:
- Add mint leaves if you like, and serve right away to preserve the crisp texture.
 Save to Pinterest
 That summer, sharing pavlova at a backyard dinner, I realized it was more than just dessert—it brought everyone together to marvel at something beautiful. From the youngest guest’s berry-smeared grin to the older relatives’ surprised “What is this?” it was pure joy in every slice.
Choosing Your Fruit Matters
I once swapped berries for sliced stone fruit when the market shelves were bare, and the pavlova tasted totally different but just as good. Ripe peaches and nectarines create a juicy topping that pairs well with cream, especially if you dust them with a pinch of powdered sugar.
Making Meringue Without Tears
My early pavlovas taught me about patience—whipping egg whites in a spotless bowl and adding sugar gradually really makes the shell sturdy. On busy days, I speed through, but slowing down always gives better results.
Last Touches Before You Serve
Right before serving, I check the meringue for cracks—it’s normal, and actually makes it feel rustic and homemade. The whipped cream masks any imperfections, and fresh berries add drama. Garnishing with mint is great if you want a splash of green.
- Serve pavlova as soon as it's assembled or the shell will soften.
- Leftover slices are delicious but lose their crunch by the next morning.
- Don’t stress about perfect shape—uneven pavlova tastes just as wonderful.
 Save to Pinterest
 If you ever need a dessert to make people smile, pavlova is a reliable choice—simple at heart, but a bit of magic in every bite. Hope you have fun baking and sharing it with those around you.
Recipe FAQs
- → How do I achieve a crisp meringue exterior?
Ensure egg whites are beaten to stiff peaks and bake slowly at a low temperature. Allow it to cool gradually in the oven.
- → Can I use other fruits besides berries?
Yes, substitute berries with seasonal fruits such as kiwi, mango, or passionfruit for added variety.
- → How should whipped cream be prepared?
Beat cold heavy cream with powdered sugar and vanilla until soft peaks form, then spread over the cooled pavlova.
- → Is this dessert gluten-free?
Yes, all main ingredients are gluten-free. Always check for cross-contamination if allergies are a concern.
- → How can I prevent the pavlova from collapsing?
Don't open the oven door while baking. Allow gradual cooling inside the oven to maintain structure.
- → What tools are necessary for preparation?
You’ll need an electric mixer, mixing bowls, spatula, baking sheet, and parchment paper for successful results.