Save to Pinterest
 Imagine a focaccia so beautiful it belongs in an art gallery, yet so delicious you won't be able to resist slicing into it. Baby in Bloom Herb Focaccia with Floral Veggie Art transforms a classic Mediterranean bread into an edible masterpiece, where vibrant bell peppers bloom like garden flowers, asparagus spears form delicate stems, and fresh herbs dance across a golden, dimpled canvas. This stunning bread is more than just a feast for the eyes—it's a celebration of spring, creativity, and the simple joy of baking with love. Whether you're hosting a baby shower, spring brunch, or simply want to elevate your bread-baking game, this focaccia brings garden-fresh beauty and herbaceous Mediterranean flavor to your table.
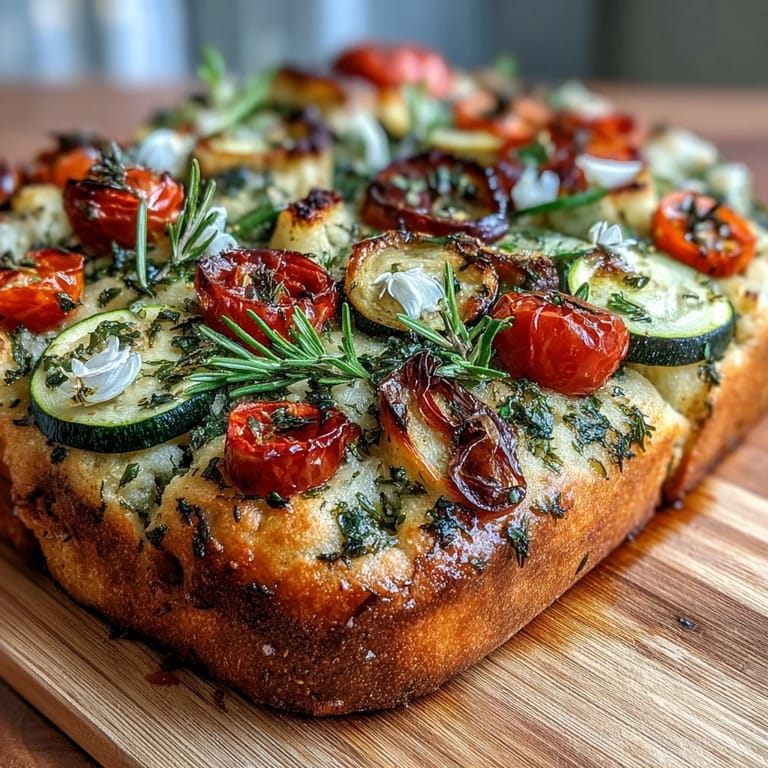
Save to Pinterest The magic of this focaccia lies not just in its appearance, but in the harmonious marriage of tender, olive oil-enriched bread and fresh, garden vegetables that roast to sweet perfection. As the focaccia bakes, the vegetables caramelize slightly, the herbs release their aromatic oils, and the dough puffs up around your edible garden design. Each slice reveals layers of flavor—earthy rosemary, sweet roasted peppers, herby thyme, and that unmistakable golden crust that makes focaccia so irresistible. It's a recipe that invites you to slow down, get creative, and enjoy the meditative process of arranging nature's colorful bounty into something truly special.
Ingredients
Tired of Takeout? 🥡
Get 10 meals you can make faster than delivery arrives. Seriously.
One email. No spam. Unsubscribe anytime.
- Dough: 500 g (4 cups) bread flour, 2 tsp instant yeast, 2 tsp sugar, 2 tsp fine sea salt, 325 ml (1⅓ cups) lukewarm water, 60 ml (¼ cup) extra-virgin olive oil, plus more for brushing
- Toppings – Floral Veggie Art: 1 red bell pepper sliced into thin rings, 1 yellow bell pepper sliced into thin rings, 1 small red onion thinly sliced, 6–8 cherry tomatoes halved, 1 small zucchini thinly sliced, 8–10 asparagus spears halved lengthwise, 1 carrot peeled and sliced into thin ribbons, fresh herbs (rosemary, thyme, basil, parsley, chives, dill) for stems, leaves, and garnishing, edible flowers (optional, e.g., pansies, nasturtiums), flaky sea salt for sprinkling, freshly ground black pepper
Instructions
- Step 1: Make the Dough
- In a large bowl, mix bread flour, instant yeast, sugar, and salt. Make a well in the center and pour in lukewarm water and olive oil. Stir until a sticky dough forms.
- Step 2: Knead
- Turn the dough onto a lightly floured surface and knead for 8–10 minutes until smooth and elastic. Alternatively, use a stand mixer with a dough hook for 5–7 minutes.
- Step 3: First Rise
- Place dough in a lightly oiled bowl, cover with a damp cloth, and let rise in a warm spot until doubled in size (1–2 hours).
- Step 4: Prepare the Pan
- Preheat oven to 220°C (425°F). Line a large baking sheet (about 30x40 cm/12x16 in) with parchment paper and drizzle with olive oil.
- Step 5: Shape the Dough
- Punch down the dough and transfer to the baking sheet. Stretch and press the dough to fit the pan, creating dimples with your fingertips.
- Step 6: Oil the Surface
- Brush the surface generously with olive oil.
- Step 7: Create Your Veggie Art
- Arrange vegetables and herbs artistically to create floral patterns (flowers with bell pepper rings and tomatoes, stems with asparagus or chives, leaves with herbs, petals with carrot ribbons or zucchini slices). Add edible flowers if using.
- Step 8: Season
- Sprinkle with flaky sea salt and black pepper.
- Step 9: Rest
- Let the decorated dough rest uncovered for 10–15 minutes.
- Step 10: Bake
- Bake for 22–25 minutes, or until golden and cooked through. Rotate the pan halfway for even browning.
- Step 11: Cool and Serve
- Cool on a rack for 10 minutes before slicing and serving.
Zusatztipps für die Zubereitung
For the most beautiful results, slice your vegetables as uniformly and thinly as possible—a mandoline is your best friend here. Before arranging your veggie art, sketch out a rough design on paper or visualize the pattern you want to create. Start with larger elements like bell pepper flowers, then fill in with smaller details like herb stems and cherry tomato centers. Don't be afraid to press the vegetables gently into the dough so they adhere during baking. The dough should be well-dimpled and generously oiled—this creates those signature focaccia pockets and ensures a crispy, golden crust. If your kitchen is cool, place the dough near a warm oven or in a slightly heated oven (turned off) to help it rise. For extra flavor depth, infuse your olive oil with minced garlic, lemon zest, or red pepper flakes before brushing it onto the dough.
Varianten und Anpassungen
This recipe is wonderfully adaptable to seasons and preferences. In summer, use heirloom tomato slices, grilled eggplant, and fresh basil. In autumn, try roasted butternut squash ribbons, caramelized onions, and sage leaves. For a Mediterranean twist, add Kalamata olives, sun-dried tomatoes, and feta cheese crumbles. Create a vegan version by keeping the toppings plant-based (the dough already is). For a gluten-free option, substitute with a gluten-free bread flour blend, though texture may vary. Add protein by tucking in strips of prosciutto or smoked salmon after baking. For a white pizza-style version, spread a thin layer of ricotta or goat cheese on the dough before adding vegetables. Kids love helping with the veggie arrangement—let them create their own edible garden scenes. You can also make mini focaccias by dividing the dough into individual portions for personal servings.
Serviervorschläge
This stunning focaccia is perfect as a showstopping centerpiece for spring brunches, baby showers, garden parties, or Easter celebrations. Serve it warm or at room temperature, cut into squares or wedges, alongside a fresh green salad dressed with lemon vinaigrette. It pairs beautifully with a cheese and charcuterie board, marinated olives, and whipped ricotta for dipping. For beverages, try sparkling lemonade, iced herbal tea, crisp white wine like Pinot Grigio or Sauvignon Blanc, or a light rosé. This focaccia also makes an elegant appetizer when cut into small squares and served on a wooden board with fresh fruit and nuts. Leftovers (if there are any!) can be wrapped and enjoyed the next day, lightly reheated in the oven to restore crispness, or transformed into gourmet sandwiches with fresh mozzarella, arugula, and balsamic glaze.
 Save to Pinterest
 Baby in Bloom Herb Focaccia with Floral Veggie Art is more than just bread—it's an edible celebration of spring, creativity, and the beauty of simple, fresh ingredients. Every slice carries the love and artistry you poured into arranging those colorful vegetables, the patience of waiting for the dough to rise, and the anticipation of pulling that golden masterpiece from the oven. Whether you're celebrating a new life at a baby shower, hosting a spring gathering, or simply treating yourself to the joy of creative baking, this focaccia brings people together around something truly special. So gather your vegetables, roll up your sleeves, and let your inner artist bloom. Your kitchen is about to become a garden, and your table will never look more beautiful.
Recipe FAQs
- → What herbs work best for this focaccia?
Fresh rosemary, thyme, basil, parsley, chives, and dill are ideal for giving aromatic and visual appeal.
- → Can I use other vegetables for the floral decorations?
Yes, any thinly sliced colorful vegetables like radishes or cucumbers can be used to create artistic patterns.
- → How long should the dough rise before baking?
Let the dough rise in a warm spot until doubled in size, usually between 1 to 2 hours.
- → Is there a way to enhance the olive oil flavor before brushing?
Infusing the olive oil with garlic or lemon zest before brushing adds a lovely depth of flavor.
- → What is the best way to store leftovers?
Store cooled focaccia in an airtight container and reheat briefly in the oven to refresh the texture.