 Save to Pinterest
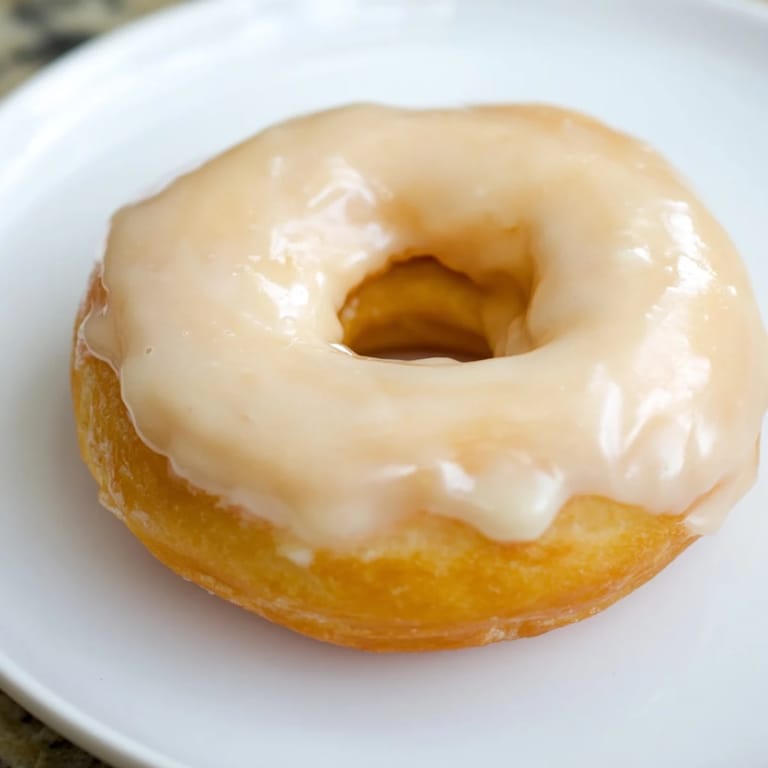
 There's something almost magical about the smell of yeast donuts frying in oil on a lazy Sunday morning. I discovered this recipe years ago when my neighbor brought over a batch still warm from her kitchen, and I've been chasing that exact texture ever since—that perfect balance between fluffy and tender that only proper yeast donuts can deliver. The first time I made them myself, my kitchen filled with this golden, buttery aroma that had my roommate wandering in before I'd even finished frying the first batch. Now whenever I shape the dough and watch it puff up during the second rise, I know something special is about to happen.
I remember making these for a coworker's birthday party and watching people reach for seconds before they'd even set down their first one—no one believed I'd made them from scratch. That moment when someone closes their eyes while eating something you've made is exactly why I love baking these donuts so much.
Ingredients
- All-purpose flour: The foundation of your dough; make sure you're measuring by weight or spooning and leveling rather than scooping straight from the bag, which can add unwanted density.
- Warm whole milk: This activates your yeast and adds richness that keeps these donuts tender; if it's too hot, you'll kill the yeast, too cold and it won't bloom properly.
- Unsalted butter: Melted and incorporated while still slightly warm, it creates that silky crumb without overpowering the vanilla in the glaze.
- Granulated sugar: Just enough to feed the yeast and add gentle sweetness to the dough itself.
- Active dry yeast: The star ingredient that gives these their signature lift and airy structure; don't skip this for instant yeast without adjusting quantities slightly.
- Room temperature eggs: They incorporate more smoothly and create a more uniform dough; cold eggs can seize up and resist blending.
- Fine salt: A pinch is all you need; it enhances flavor without making the donuts taste salty.
- Neutral oil for frying: Canola and vegetable oil have high smoke points and won't impart competing flavors; keep it at exactly 350°F for golden results every time.
- Powdered sugar: Sift it first or you'll end up with lumps in your otherwise silky glaze.
- Pure vanilla extract: The real stuff makes a noticeable difference in the final glaze.
Tired of Takeout? 🥡
Get 10 meals you can make faster than delivery arrives. Seriously.
One email. No spam. Unsubscribe anytime.
Instructions
- Wake up the yeast:
- Combine your warm milk and yeast in a small bowl and let it sit for about 5 minutes until it becomes foamy and fragrant. If it doesn't foam, your yeast is dead and it's time to start over with a fresh packet.
- Build your dough base:
- Whisk together the flour, sugar, and salt in a large bowl or stand mixer to distribute everything evenly. This is your dry foundation, and mixing it well prevents pockets of unmixed flour later.
- Bring it together:
- Add your foamy yeast mixture, melted butter, and room temperature eggs to the dry ingredients and mix until a shaggy, sticky dough forms. Don't worry if it looks rough at this stage; that's exactly what you want.
- Knead until smooth:
- On medium speed (or by hand if you're feeling it), knead for 5 to 7 minutes until the dough becomes smooth, elastic, and springs back when you poke it. You'll feel the transformation happen under your hands—it goes from sticky and chaotic to supple and alive.
- Let it rise:
- Place your dough in a greased bowl, cover it with a damp kitchen towel, and set it in a warm spot until it doubles in size, usually 1 to 1.5 hours. A turned-off oven with the light on works beautifully for this.
- Roll and cut:
- Turn the puffy dough onto a floured surface and gently roll it to about 1/2-inch thickness, working slowly so you don't deflate all that beautiful air you've created. Use a floured 3-inch donut cutter to cut out your shapes, gathering the scraps and rerolling as needed.
- Second rise:
- Arrange your cut donuts and holes on a parchment-lined tray, cover loosely with a towel, and let them puff up again for 30 to 45 minutes until they look pillowy and almost weightless. They should jiggle slightly when you gently shake the tray.
- Heat your oil:
- Bring your oil to exactly 350°F in a deep fryer or heavy-bottomed pot; use a thermometer because eyeballing it leads to either greasy or burnt donuts. This temperature is non-negotiable.
- Fry until golden:
- Working in batches so you don't overcrowd the pot, carefully lower a donut into the hot oil and fry for about 1 to 1.5 minutes per side until it's a deep golden brown. You'll know it's ready when it sounds crispy when you tap it with your spoon.
- Drain and cool slightly:
- Use a slotted spoon to transfer each donut to a wire rack lined with paper towels and let them rest for just a few minutes while still warm. This is the perfect window for glazing.
- Make the glaze:
- Whisk together sifted powdered sugar, milk, vanilla extract, and a pinch of salt until you have a smooth, pourable glaze with no lumps. Taste it and adjust the vanilla or salt if needed.
- Glaze while warm:
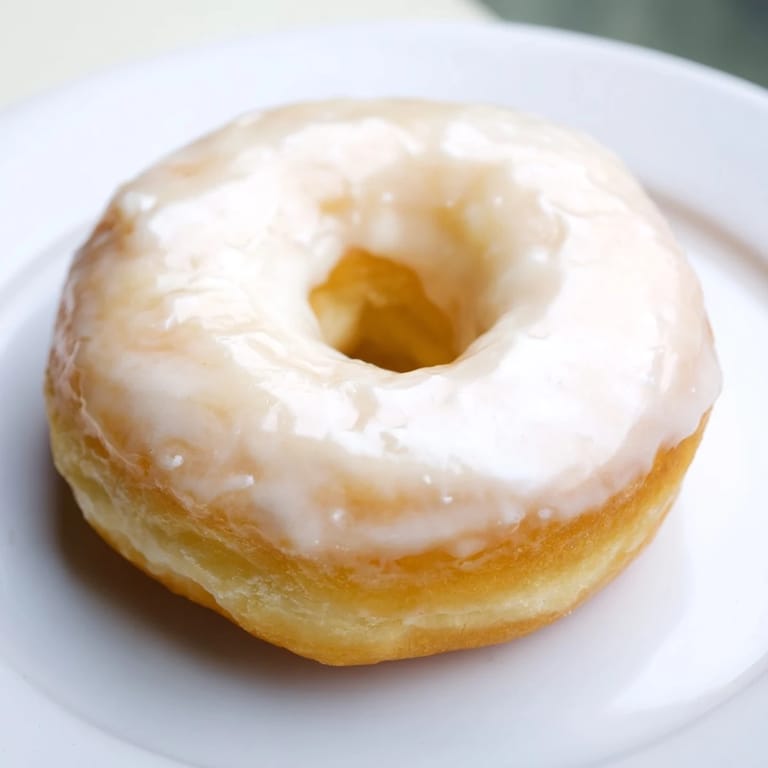
- Dip each warm donut into the glaze, letting the excess drip off back into the bowl, then place it back on the rack to set. The warmth of the donut helps the glaze adhere and creates that beautiful satin finish.
 Save to Pinterest
 I'll never forget the first time someone told me my homemade donuts tasted better than the ones from the fancy bakery downtown. That compliment made every sticky finger, every careful temperature check, and every moment spent waiting worth it.
The Science Behind the Fluff
Yeast donuts work differently than cake donuts because the yeast creates thousands of tiny gas bubbles throughout the dough as it ferments, giving them that characteristic airy crumb. Understanding that you're not just mixing ingredients but actually cultivating living yeast cells changes how you approach the process—temperature, timing, and patience all matter because you're working with a living organism. I learned this the hard way when I tried rushing the rise and ended up with dense, disappointing donuts that reminded me yeast can't be hurried.
Variations Worth Trying
Once you nail the basic recipe, the fun really begins because the dough itself is neutral enough to support countless flavor directions. I've made batches with a whisper of nutmeg or cardamom in the dough, glazes infused with lemon zest or almond extract, and even a cinnamon-sugar coating that had my family demanding I make them that way permanently. The beauty is that you can change up the glaze or even the dough seasonings without affecting the fundamental technique, so you can make these feel fresh and exciting even if you're making them weekly.
Storage and Reheating Tips
Fresh is absolutely best, but I know that's not always realistic when you've made a dozen donuts and you're just one person. They'll keep in an airtight container for a day or two, and while they won't have quite the same magic as fresh, a quick 10-second microwave zap brings back some of that warm, soft texture.
- Store them in an airtight container at room temperature to keep them from drying out or going stale.
- If you're freezing extras, wrap them individually and thaw at room temperature for best results.
- A light dusting of cinnamon sugar on top when they're still warm adds a finishing touch that feels special.
 Save to Pinterest
 Making yeast donuts is one of those recipes that feels a little fancy but rewards you so generously for your effort that you'll find yourself wanting to make them again and again. There's something deeply satisfying about pulling a batch of perfectly golden, beautifully glazed donuts out of the oil and knowing you made them with your own hands.
Recipe FAQs
- → How do I ensure the donuts are light and airy?
Use warm milk to activate the yeast properly and knead the dough until smooth and elastic. Allow the dough to rise twice to develop airiness before frying.
- → What oil is best for frying donuts?
Neutral oils such as canola or vegetable oil work best for frying as they don’t impart strong flavors and can maintain a steady temperature.
- → Can I vary the vanilla glaze flavor?
Yes, you can add almond extract or citrus zest to the glaze for different aromatic notes while maintaining its sweetness.
- → How do I keep the glaze from becoming too runny?
Adjust the powdered sugar amount if needed, gradually adding it until the glaze reaches a smooth, slightly thick consistency that coats the donuts well.
- → What’s the best way to store these donuts?
Store in an airtight container for 1–2 days at room temperature to preserve freshness, though they are best enjoyed the same day.
- → Can I prepare the dough in advance?
The dough can be mixed and allowed to rise once, then refrigerated overnight before shaping and frying to save time.